Homebrew
国内安装比较麻烦,最好走镜像,参考地址:HomebrewCN: Homebrew 国内安装脚本,快速部署 brew ,国内镜像
安装脚本如下:
/bin/zsh -c "$(curl -fsSL https://gitee.com/cunkai/HomebrewCN/raw/master/Homebrew.sh)"卸载脚本如下:
/bin/zsh -c "$(curl -fsSL https://gitee.com/cunkai/HomebrewCN/raw/master/HomebrewUninstall.sh)"这个方法安装的Homebrew使用了清华大学源的Core,可能会出现问题,更换为阿里云的即可,修改~/.zprofile,在export里添加Homebrew的Core的远程仓库,完整的如下:
  export HOMEBREW_PIP_INDEX_URL=http://mirrors.aliyun.com/pypi/simple #ckbrew
  export HOMEBREW_BREW_GIT_REMOTE=https://mirrors.aliyun.com/homebrew/brew.git #ckbrew
  export HOMEBREW_CORE_GIT_REMOTE=https://mirrors.aliyun.com/homebrew/homebrew-core.git #ckbrew
  export HOMEBREW_API_DOMAIN=https://mirrors.aliyun.com/homebrew/homebrew-bottles/api  #ckbrew
  export HOMEBREW_BOTTLE_DOMAIN=https://mirrors.aliyun.com/homebrew/homebrew-bottles #ckbrew
  eval $(/opt/homebrew/bin/brew shellenv) #ckbrew
Parallels Desktop
截止2024/08/28,拿到的最佳搭配是19.3.0配合激活工具5.1.1。
先附上PD的下载地址:Parallels Desktop 19.3.0,附件激活工具:
容易有Bug,不要使用完整的Clone操作,否则导致Mac的磁盘空间统计异常。
Aria2
配置
用brew安装后写一下配置文件:
mkdir ~/.aria2
cd ~/.aria2
touch aria2.conf
具体的配置文件如下,直接拷贝进去就完事了:
#用户名
#rpc-user=user
#密码
#rpc-passwd=passwd
#上面的认证方式不建议使用,建议使用下面的token方式
#设置加密的密钥
rpc-secret=c296466115c930df00721f39f32be37e29ed8683
#允许rpc
enable-rpc=true
#允许所有来源, web界面跨域权限需要
rpc-allow-origin-all=true
#允许外部访问,false的话只监听本地端口
rpc-listen-all=true
#RPC端口, 仅当默认端口被占用时修改
#rpc-listen-port=6800
#最大同时下载数(任务数), 路由建议值: 3
max-concurrent-downloads=5
#断点续传
continue=true
#同服务器连接数
max-connection-per-server=5
#最小文件分片大小, 下载线程数上限取决于能分出多少片, 对于小文件重要
min-split-size=10M
#单文件最大线程数, 路由建议值: 5
split=10
#下载速度限制
max-overall-download-limit=0
#单文件速度限制
max-download-limit=0
#上传速度限制
max-overall-upload-limit=0
#单文件速度限制
max-upload-limit=0
#断开速度过慢的连接
#lowest-speed-limit=0
#验证用,需要1.16.1之后的release版本
#referer=*
#文件保存路径, 默认为当前启动位置
dir=/Users/evalexp/Downloads
#文件缓存, 使用内置的文件缓存, 如果你不相信Linux内核文件缓存和磁盘内置缓存时使用, 需要1.16及以上版本
#disk-cache=0
#另一种Linux文件缓存方式, 使用前确保您使用的内核支持此选项, 需要1.15及以上版本(?)
#enable-mmap=true
#文件预分配, 能有效降低文件碎片, 提高磁盘性能. 缺点是预分配时间较长
#所需时间 none < falloc ? trunc « prealloc, falloc和trunc需要文件系统和内核支持
# file-allocation=prealloc
all-proxy=http://127.0.0.1:46721注意配置外部RPC的密钥:c296466115c930df00721f39f32be37e29ed8683
开机自启
通过brew services管理会更方便,写入如下内容到/opt/homebrew/opt/aria2/homebrew.mxcl.aria2.plist:
<?xml version="1.0" encoding="UTF-8"?>
<!DOCTYPE plist PUBLIC "-//Apple//DTD PLIST 1.0//EN" "http://www.apple.com/DTDs/PropertyList-1.0.dtd">
<plist version="1.0">
    <dict>
        <key>Label</key>
        <string>homebrew.mxcl.aria2</string>
        <key>ProgramArguments</key>
        <array>
            <string>/opt/homebrew/opt/aria2/bin/aria2c</string>
        </array>
        <key>RunAtLoad</key>
        <true/>
        <key>KeepAlive</key>
        <true/>
    </dict>
</plist>然后直接启动即可:brew services start aria2
移除使用:
brew services stop aria2
Mihomo
配置
同样通过Homebrew安装,然后注意使用Subconvert聚合一下订阅信息。
完成后修改一下配置:
mixed-port: 46721
allow-lan: true
mode: Rule
log-level: silent
external-ui: "./ui" # 外部用户界面路径,可以为绝对路径,或者 Clash 工作目录的相对路径
external-ui-name: "metacubexd" # 自定义外部用户界面名字
external-ui-url: "https://github.com/MetaCubeX/metacubexd/archive/refs/heads/gh-pages.zip" # 自定义外部用户界面下载地址
external-controller: 127.0.0.1:46720
secret: "fs8y8dy7yfshdfh"将最前方的配置修改成这样,然后拷贝到/opt/homebrew/etc/mihomo/config.yaml,再通过brew services start mihomo即可。
如果没有启动成功,就要看一下是什么问题了,通过命令行启动查看问题:
/opt/homebrew/opt/mihomo/bin/mihomo -d /opt/homebrew/etc/mihomo
INFO[2025-05-13T15:39:01.013729000+08:00] Start initial configuration in progress
INFO[2025-05-13T15:39:01.016471000+08:00] Geodata Loader mode: memconservative
INFO[2025-05-13T15:39:01.016528000+08:00] Geosite Matcher implementation: succinct
INFO[2025-05-13T15:39:01.020245000+08:00] Can't find MMDB, start download
ERRO[2025-05-13T15:39:01.115460000+08:00] can't initial GeoIP: can't download MMDB: Get "https://github.com/MetaCubeX/meta-rules-dat/releases/download/latest/geoip.metadb": connect failed: dial tcp 20.205.243.166:443: connect: connection refused
FATA[2025-05-13T15:39:01.115516000+08:00] Parse config error: rules[10265] [GEOIP,CN,🎯 全球直连] error: can't download MMDB: Get "https://github.com/MetaCubeX/meta-rules-dat/releases/download/latest/geoip.metadb": connect failed: dial tcp 20.205.243.166:443: connect: connection refused
可以看到是GitHub无法访问导致的,那么就要多试几次或者先接NAS的代理网络。
完成后启动应该是这样的:
/opt/homebrew/opt/mihomo/bin/mihomo -d /opt/homebrew/etc/mihomo
INFO[2025-05-13T15:41:34.736789000+08:00] Start initial configuration in progress
INFO[2025-05-13T15:41:34.738932000+08:00] Geodata Loader mode: memconservative
INFO[2025-05-13T15:41:34.738941000+08:00] Geosite Matcher implementation: succinct
INFO[2025-05-13T15:41:34.743043000+08:00] Initial configuration complete, total time: 6ms 然后注意使用URL访问控制面板:http://127.0.0.1:46720/ui/metacubexd/?host=127.0.0.1&hostname=127.0.0.1&port=46720&secret=fs8y8dy7yfshdfh#/overview
订阅更新与面板快速打开
环境变量配置:
export MIHOMO_CONFIG="/opt/homebrew/etc/mihomo/config.yaml"
export SUBSCRIPTION_URL="https://tools.evalexp.top/_sc/endpoint/getprofile?name=profiles/clash_merge_all.ini&token=xxx"可以通过shell来实现,注意需要环境变量MIHOMO_CONFIG以及SUBSCRIPTION_URL:
clash-sub-update() {
  echo "Backup file to $MIHOMO_CONFIG.bak ... "
  mv $MIHOMO_CONFIG "$MIHOMO_CONFIG.bak"
  echo "Request subscription..."
  curl -o $MIHOMO_CONFIG $SUBSCRIPTION_URL
  echo "Reloading mihomo..."
  curl "http://127.0.0.1:$(sed -n 's/^external-controller:[[:space:]]*.*:\(.*\)/\1/p' $MIHOMO_CONFIG)/configs?force=true" -H "Authorization: Bearer $(sed -n 's/^secret:[[:space:]]*\(.*\)/\1/p' $MIHOMO_CONFIG)" -H "Content-Type: application/json" -d "{}" -XPUT
  echo "Done."
}
clash-dash() {
  open "http://127.0.0.1:$(sed -n 's/^external-controller:[[:space:]]*.*:\(.*\)/\1/p' $MIHOMO_CONFIG)/ui/metacubexd/?host=127.0.0.1&hostname=127.0.0.1&port=$(sed -n 's/^external-controller:[[:space:]]*.*:\(.*\)/\1/p' $MIHOMO_CONFIG)&secret=$(sed -n 's/^secret:[[:space:]]*\(.*\)/\1/p' $MIHOMO_CONFIG)#/overview"
}
clash-sub-time() {
  echo "Current subscription modified time: $(stat -f '%Sm' -t '%Y-%m-%d %H:%M:%S' $MIHOMO_CONFIG)"
  seconds=$(( $(date +%s) - $(stat -f "%m" $MIHOMO_CONFIG) ))
  days=$((seconds / 86400))
  hours=$(( (seconds % 86400) / 3600 ))
  minutes=$(( (seconds % 3600) / 60 ))
  secs=$((seconds % 60))
  echo
  echo "$days days, $hours hours, $minutes minutes, $secs seconds ago"
}
全局代理
还是一样用Shell脚本即可:
clash-global-proxy-enable() {
  port=$(cat $MIHOMO_CONFIG | grep -E "^mixed-port:" | grep -o '[0-9]\+')
  if [ $? -ne 0 ]; then
    echo "Mixed port not found in $MIHOMO_CONFIG"
    port=$(cat $MIHOMO_CONFIG | grep -E "^socks-port:" | grep -o '[0-9]\+')
    if [ $? -ne 0 ]; then
      echo "Socks port not found in $MIHOMO_CONFIG"
      echo "None of socks port available, please check your config : $MIHOMO_CONFIG"
      return 1
    fi
  fi
  echo "Set global proxy to socks5://127.0.0.1:$port"
  sudo networksetup -setsocksfirewallproxy Wi-Fi 127.0.0.1 $port && echo "Done."
}
alias clash-global-proxy-disable='echo "Unset global proxy..." && sudo networksetup -setsocksfirewallproxystate Wi-Fi off && echo "Done."'
Burp 虚拟机配置
由于在Windows里的虚拟机里使用的是ZuluJDK Arm64版本,因此实际上在Java中取到的os.arch为arm64,将其强制修改为win64即可启动Burp内置的浏览器,加参数:-Dos.arch=win64。
关于字体漂移,修改字体为12号宋体即可。
也可以使用exe安装,完成后配置VMOptions即可。
虚拟机里Java程序分辨率异常
加JVM参数:
-Dsun.java2d.dpiaware=false虚拟机里的Java程序SSL异常
加JVM参数
-Djsse.enableSNIExtension=falseBurp Mac配置
直接下载官方的dmg版本,注意选择M芯片,不然浏览器打不开。下载后需要修改一下VMOptions:
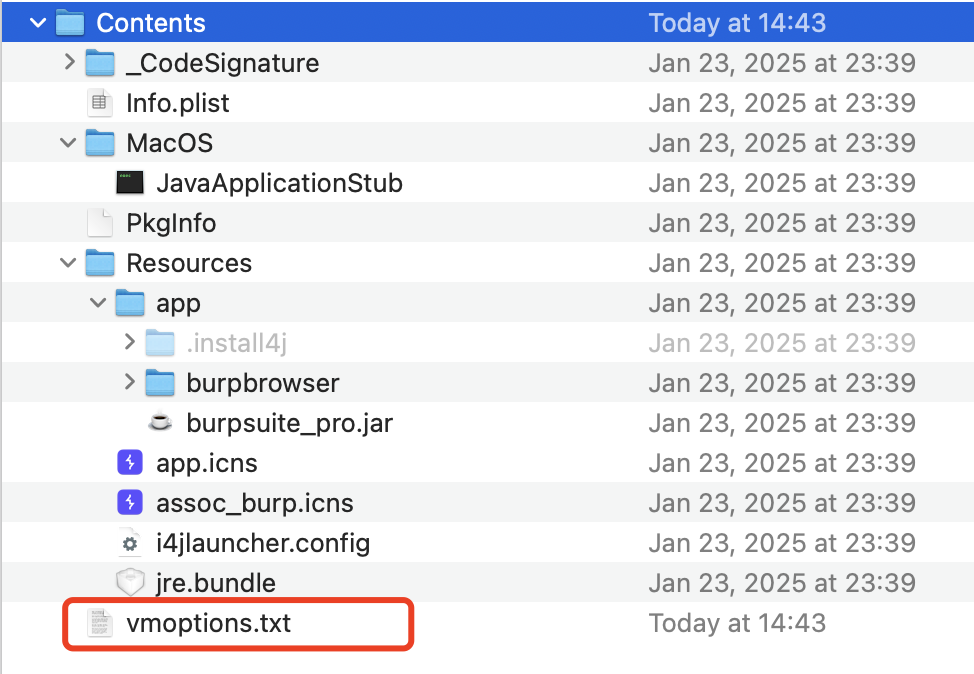
添加内容如下:
--add-opens=java.desktop/javax.swing=ALL-UNNAMED
--add-opens=java.base/java.lang=ALL-UNNAMED
--add-opens=java.base/jdk.internal.org.objectweb.asm=ALL-UNNAMED
--add-opens=java.base/jdk.internal.org.objectweb.asm.tree=ALL-UNNAMED
--add-opens=java.base/jdk.internal.org.objectweb.asm.Opcodes=ALL-UNNAMED
-javaagent:/Users/evalexp/Tools/Web/BurpSuite/BurpLoaderKeygen.jar
最后的Jar注意位置信息。
OpenConnect 虚拟机配置
由于Arm64架构,自带的wintun64.dll是64位的,无法正常使用,导致无法连接OpenConnect的节点。
解决方案是弃用wintun方案,该用OpenVPN的Win TAP方案,下面是OpenVPN Win Tap的所有Win10平台的驱动,Win11也可以兼容:
解压后将其中的arm64文件夹丢到Win11的虚拟机里,然后进入设备管理器,菜单上依次选择操作->添加过时硬件->手动选择的硬件->选择网络适配器->从磁盘安装(选择刚刚解压文件夹里的inf文件)完成后使用命令行方式连接openconnect即可(GUI方式仍不可用)。
卸载pkg
pkgutil --files xxx.xxx.xxx
# 删除上面的全部文件和目录
sudo pkgutil --forget xxx.xxx.xxx
Sudo使用指纹认证
编辑文件:
sudo cp /etc/pam.d/sudo_local.template /etc/pam.d/sudo_local
sudo vim /etc/pam.d/sudo_local
# In Vim
# sudo_local: local config file which survives system update and is included for sudo
# uncomment following line to enable Touch ID for sudo
auth       sufficient     pam_tid.so # 这行取消注释即可
# Save and quit vim将模板文件拷贝成sudo_local后,取消注释即可。
VMWare Fusion安装Win11没网络跳过
按Shift + F10,输入oobe\ByPassNRO即可;重新加载就会看到了我没有Internet的选项了。
ZSH
安装 oh-my-zsh
sh -c "$(curl -fsSL https://raw.githubusercontent.com/ohmyzsh/ohmyzsh/master/tools/install.sh)"注意挂代理
设置主题
omz theme set ys可以用
omz theme load xxx动态加载主题,用omz theme list列出主题,选择适合自己的
插件
先下载zsh-autosuggestions:
git clone https://github.com/zsh-users/zsh-autosuggestions ${ZSH_CUSTOM:-~/.oh-my-zsh/custom}/plugins/zsh-autosuggestions然后编辑~/.zshrc启用:
plugins=(
    git
    z
    sudo
    extract
    zsh-autosuggestions
)